If you are looking for a way to unlock Asus Rog Phone 2 and install the latest TWRP recovery, then you are in the right place. Unlocking your smartphone/tablet is the first step to extract the complete juice of your device hardware. Once Asus Rog Phone 2 is unlocked, you can then easily install a custom recovery such as TWRP recovery, can root it using Magisk or SuperSu. Once rooted you can perform various system-related task which otherwise isn’t possible.
How To Unlock and Install TWRP Recovery On Asus Rog Phone 2
WARNING: Unlocking the bootloader will erase all data on your device! Before proceeding, ensure the data you would like to retain is backed up to your PC and/or your Google account, or equivalent. We (SavvyUpdate Team) are not responsible if anything happens to your device while following this tutorial.
- Make sure your computer has working adb and fastboot. Setup instructions can be found here.
- Enable USB Debugging on your device. [Tutorial]
- Proper USB driver is installed. [Download]
How To Unlock Asus Rog Phone 2
- Enable OEM unlock in the Developer options under device Settings, if present.
- Once done, connect your device to your PC using a USB cable.
- Now on your computer open a command prompt (on Windows) or terminal (on Linux or macOS) window, and type: adb reboot bootloader . You can also boot your Asus Rog Phone 2 to fastboot mode by pressing Volume Down + Power when the device power is off, until a boot menu appears.
- To confirm the device is connected in fastboot mode or not, type: fastboot devices.
- Once confirmed, type the following command to unlock the bootloader: fastboot oem unlock.
- The device should automatically reboot, if not then reboot it manually.
- Since the device resets completely, you will need to re-enable USB debugging for the next recovery installation process.
How To Install TWRP Recovery 3.4.0-0 on Asus Rog Phone 2
- Download TWRP.
- Once done, connect your device to your PC using a USB cable.
- Now on your computer open a command prompt (on Windows) or terminal (on Linux or macOS) window, and type: adb reboot bootloader . You can also boot your Asus Rog Phone 2 to fastboot mode by pressing Volume Down + Power when the device power is off.
- To confirm the device is connected in fastboot mode or not, type: fastboot devices.
- Once confirmed, type the following command to flash TWRP Recovery: fastboot flash recovery twrp-x.x.x-x-mauronofrio.img. [Note: Replace TWRP file name with your downloaded file name]
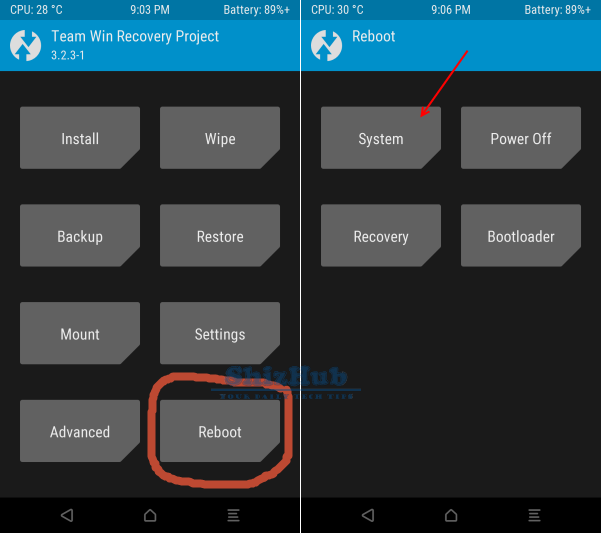
- The device should automatically reboot, if not then reboot it manually.
That’s it! You now have an unlocked Asus Rog Phone 2 with the latest supported TWRP Recovery installed.